18sound 18” Dual Subwoofer build
Printed From: Speakerplans.com
Category: Plans
Forum Name: Ported Enclosures
Forum Description: Post all your reflex and bandpass and 'other' boxes with holes in stuff here...
URL: https://forum.speakerplans.com/forum_posts.asp?TID=102540
Printed Date: 26 March 2026 at 9:48pm
Software Version: Web Wiz Forums 12.08 - https://www.webwizforums.com
Topic: 18sound 18” Dual Subwoofer build
Posted By: wilidapili
Subject: 18sound 18” Dual Subwoofer build
Date Posted: 12 September 2018 at 1:45pm
|
Hey, After the weekend we will start building the bass reflex cabinet design by 18sound: http://www.eighteensound.com/Portals/0/EnclosuresKits/18sound_18_dual_subwoofer_kit.pdf It will be my (our) first speaker build. We will go as per their recommendation and use the 18TLW3000. Here is the CAD modeled version that I made. In addition to the original picture, I added the 45* braces to the corners and a double strength baffle, as well as grooves for the baffle, "X" structure and 45* braces to sit in. Still need to decide on places for the handles. It will be built from 18mm baltic birch ply. Do you think it will be plenty strong? 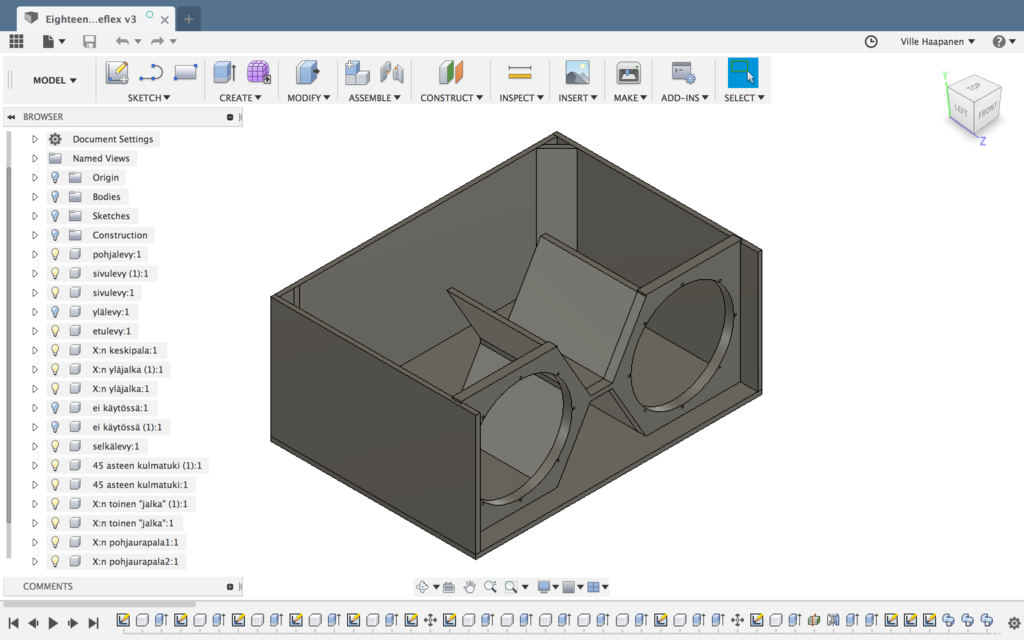 The only other thread where I've seen this cabinet built is here: https://soundforums.net/community/threads/18-sound-design.205627/ He's done a crazy good looking job on the bracing, but seems a bit too complex for me, and I hope ours will be enough. Will add more photos as soon as the build starts.
|
Replies:
Posted By: MarjanM
Date Posted: 12 September 2018 at 2:34pm
You need more bracing inside, especially on the back pannel. ------------- Marjan Milosevic MM-Acoustics www.mm-acoustics.com https://www.facebook.com/pages/MM-Acoustics/608901282527713 |
Posted By: wilidapili
Date Posted: 12 September 2018 at 3:01pm
That's what I was afraid to hear. Thanks for the photo. I don't really know how I will achieve this. Maybe something like this...?  |
 MarjanM wrote:
Posted By: Meat
Date Posted: 12 September 2018 at 7:23pm
|
Marjan is absolutely right. You need more bracing. You probably need more than your modified diagram too. I built a low tuned reflex a few years ago with no bracing on the back panel or side panels and they resonated like crazy. Before modification it was totally unacceptable at levels 10x less than you'll be feeding that box. The design looks pretty cool. Looking forward to seeing the build. ------------- Don't test the champignon sound |
Posted By: snowflake
Date Posted: 12 September 2018 at 8:27pm
|
don't put braces exactly in the middle of panels. it will stop the lowest frequency panel vibration but do absolutely nothing to stop the next highest one. optimum positions are either 45% across the panel, or two braces at 35% and 65% across the panel. |
Posted By: wilidapili
Date Posted: 12 September 2018 at 8:51pm
Hmm okay. I think I will then try to copy the bracing as is shown in the other forum topic I linked; I think I will make the bracing exactly same, but just from 2pieces that meet in the middle with half lap joint, so that I can cut them with my 600 x 900 CNC.
This is very interesting information, thanks for this. However, I think making the bracing somewhere else than the middle will be difficult if I want to join the bracing with the ”X” -shape, since the flat piece of it is dead center... I don’t think panel vibration should be an issue with above mentioned bracing, at least the builder of that cabinet has not mentioned anything about vibration/resonance.
|
Posted By: MarjanM
Date Posted: 12 September 2018 at 9:06pm
|
Those plans are free plans. As such you dont expect to get uber professional design that can compete with the high class manufacturer cabinets. If it was that easy, everyone would be making those free plans and not investing in "branded" products. Contrary to the belief, most often you dont pay only for the badge.
------------- Marjan Milosevic MM-Acoustics www.mm-acoustics.com https://www.facebook.com/pages/MM-Acoustics/608901282527713 |
Posted By: wilidapili
Date Posted: 12 September 2018 at 9:35pm
If they provide enclosure plans for their drivers, they are meant to boost the sales of their drivers. This means they SHOULD want the cabs sounding as good as possible, so I definitely expect them to give uber professional design that makes their drivers sound as good as possible, otherwise it is just shit marketing from them to provide plans for a bad sounding, vibrating cab. |
Posted By: MarjanM
Date Posted: 12 September 2018 at 9:40pm
|
You are wrong. DIY market makes aproximalety 5% of the total sale. They would not like to endanger the sale of the companies that buys thousands of those drivers. They would be shoting them self in the leg. ------------- Marjan Milosevic MM-Acoustics www.mm-acoustics.com https://www.facebook.com/pages/MM-Acoustics/608901282527713 |
Posted By: wilidapili
Date Posted: 12 September 2018 at 9:47pm
That’s a fair point and I get that. Agree to disagree. However, not really relevant with this topic anymore.
|
Posted By: ceharden
Date Posted: 13 September 2018 at 12:47am
|
Something that would probably make a big difference would be to extend the narrow section between the ports to the rear panel. That will tie the front and rear of the box together. The 45deg panels in the corners will probably do little to reduce resonances. You'd be better off with bracing going down the end panels then attaching to the ear. You don't always need a lot of bracing, just in the right places. The aim is to push all the resonances out of the range the cab will be used in. In this case ~150Hz would be a good figure to aim for. You might have to do what everyone else who design cabs does, which is to build one, find out where the resonances are, add bracing in that area and keep going til they're all high enough. One good way of doing it is to lie the box down, put a thin layer of dry sand (or similar) on the panel then run a sine wave sweep. The anti-nodes (points of highest movement) will show up by the sand moving away from those areas. Alternatively my own method is just to tap the cab with a screwdriver handle etc and listen to the frequency of the resonances.... 18Sound and other manufacturers provide this type of plans as an example of how the drivers can be used and are intended as a starting point, not a finished design. |
Posted By: odc04r
Date Posted: 13 September 2018 at 10:23am
|
The really modern tech version would be to buy a small acellerometer of the sort used in your phone, attach to box in various places under load and turn the data gathered into a a graph of frequency vs displacement. Then use it as a sort of stethoscope to identify the worst areas that need work. This is how modern enclosures will be tested, using multiple sensors all over the cabinet. I like the sand idea too though, that's neat and simple. Need to open and close the box which is a pita but then you would always need to when adding any extra bracing required I guess.
|
Posted By: AndyWave
Date Posted: 13 September 2018 at 11:42am
|
Hi Slight OT at first - Violin/cello makers map the resonances with rice grains. They put violin body pieces above a speaker cone, some 5cm away, and watch the grains making a pattern. I once made a 10-100 Hz 10" closed box and suitable analogue oscillator to a violin luthier as tuning tool. Of course the maximum spl is not the point here. Back to the point; I've done resonance mapping just like Ceharden says, on unbraced empty cabinet prototype but with rice grain or just feeling un-braced cabinet sides with my fingers and marking resonance nodes with a pencil. Almost every time node points form a pattern, just draw straight lines with ruler through these points and there are your required bracing lines visible. Therefore its handy to have one side of the prototype cabinet attached by screws and sealed with window weather stripping. Usually I use 10-500Hz continuous sweep signal at first, naturally at sensible SPL level. Watch out the driver excursion! After bracing cabinet, apply recommended or calculated processing and repeat approaching nominal RMS power.
------------- torturing electrons since ...... |
Posted By: snowflake
Date Posted: 13 September 2018 at 1:20pm
|
+1 brace the front to the back. and your corner braces are just a waste of air and wood. |
Posted By: wilidapili
Date Posted: 14 September 2018 at 9:53am
Thanks for all the feedback. I removed the corner braces and went and copied the shape of the braces Helge Bentsen had done at soundforums.net, since it is tried and tested. The brace is now combined with the port divider and now all of the panels are tied to each other, and the whole brace will sit in a 7mm deep groove.  |
Posted By: bass*en*mass
Date Posted: 14 September 2018 at 10:11pm
|
looks much better now.. maybe join the back to the baffle by extending the middle braces aswell and you should get as nice solid cab..! |
Posted By: wilidapili
Date Posted: 14 September 2018 at 10:44pm
Do you mean the braces that are on either side of the baffle that aren’t touching the baffle? I extended them to touch the baffle after posting this, but I’m not sure if the drivers will fit to mount when done this way. Otherwise the back is joined with the baffle via the port divider, which is also sitting in a groove within the baffle.
|
Posted By: boots-hifi
Date Posted: 14 September 2018 at 11:35pm
| Ive been looking at this design for some time. Ill be interested to see the outcome. I know someone on the prosound web forum built a pair, he was very complimentary of the design. Bracing however did concern me, what ever the solution built properly this design should rock. |
Posted By: AndyWave
Date Posted: 19 September 2018 at 12:57pm
|
Mr Wili, just sent you some e-mail. ------------- torturing electrons since ...... |
Posted By: wilidapili
Date Posted: 19 September 2018 at 2:12pm
Right back at ya! On another note: Building has begun. I will post some photos maybe later today or tomorrow when all of the panels have been cut!
|
Posted By: wilidapili
Date Posted: 26 September 2018 at 8:04pm
|
Here's some photos I've snapped during the process. 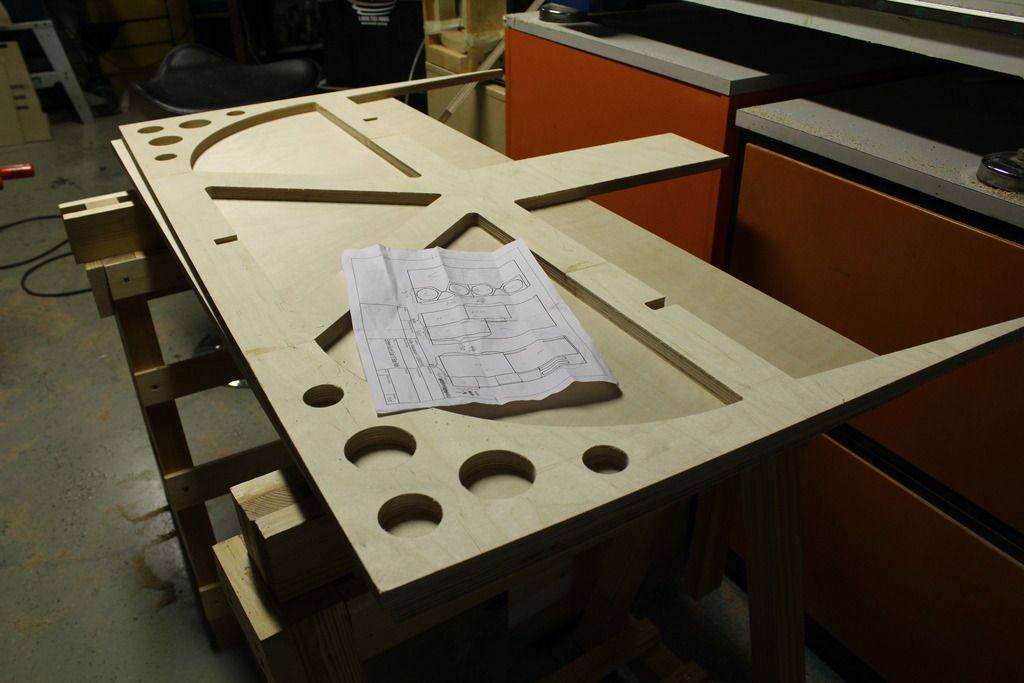 Bracing structure cut on the CNC in three pieces and glued together with half-lap joints. And my cut list. 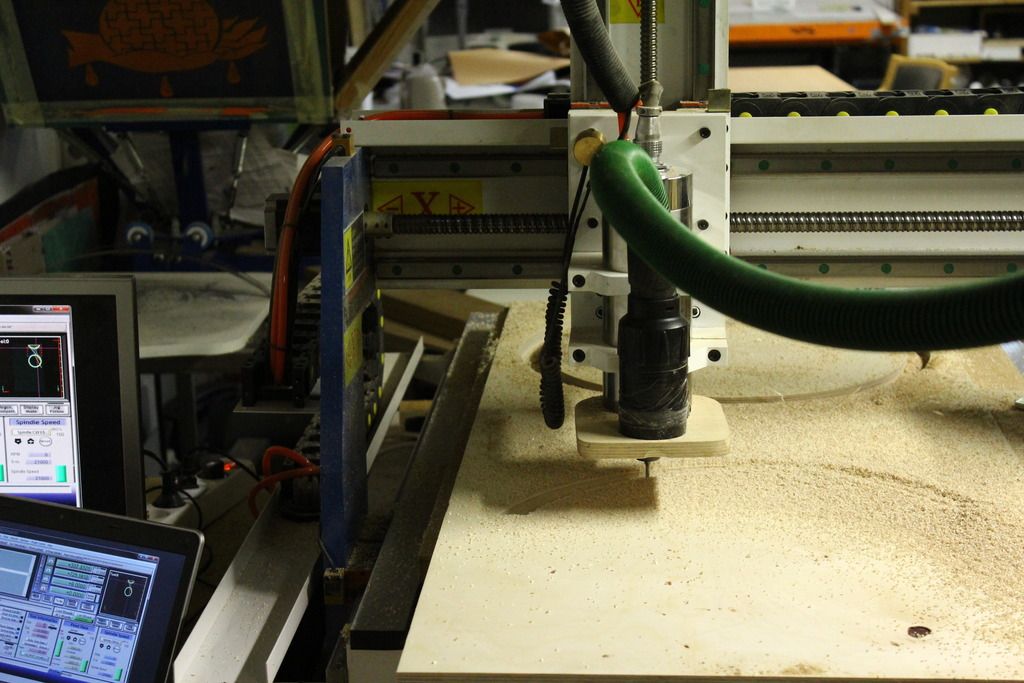 Milling the baffle. The CNC is 600 x 900 mm, so I couldn't mill the whole thing. 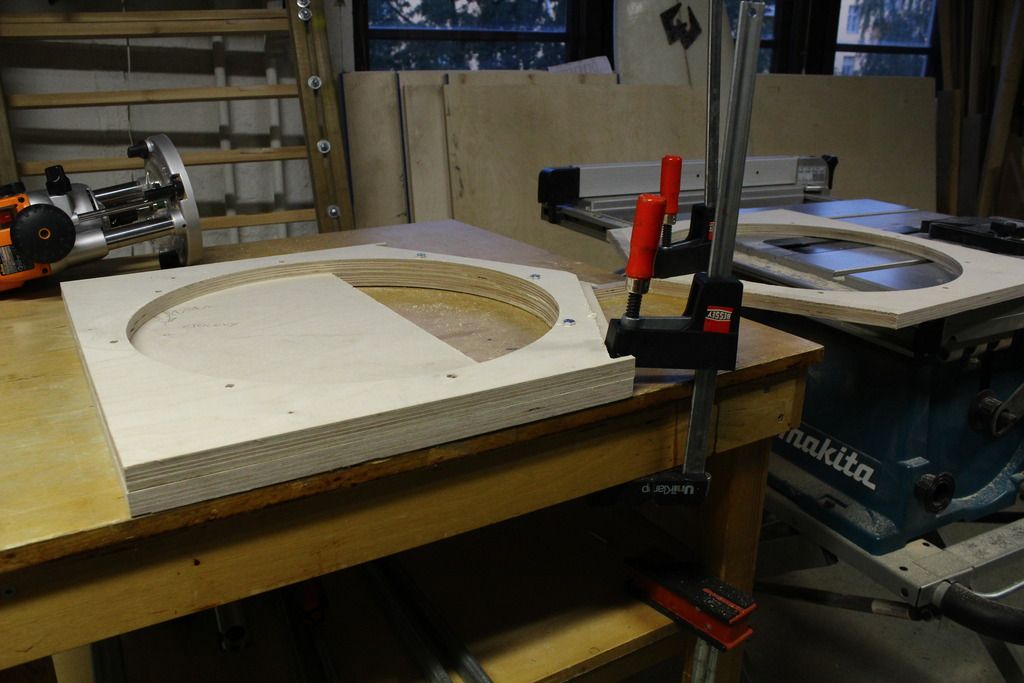 So I decided to cut part of the second opening and make a jig that attaches to the mounting screws so that I can use a router with a flush trim bit (actually, I used a scroll saw to remove most of the material before using the router). 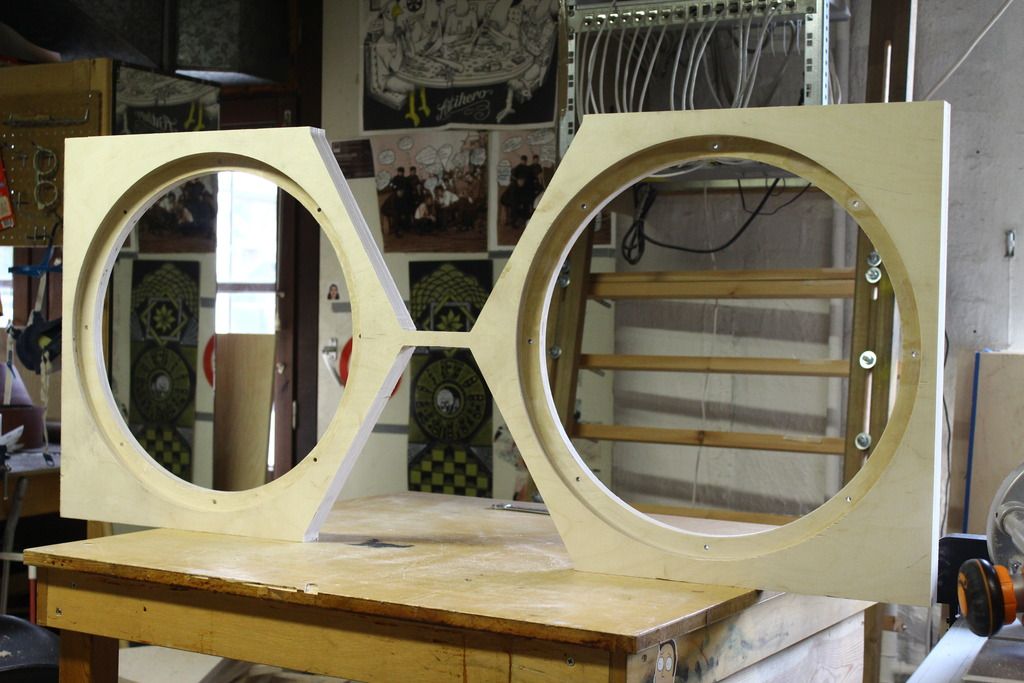 Voilá! 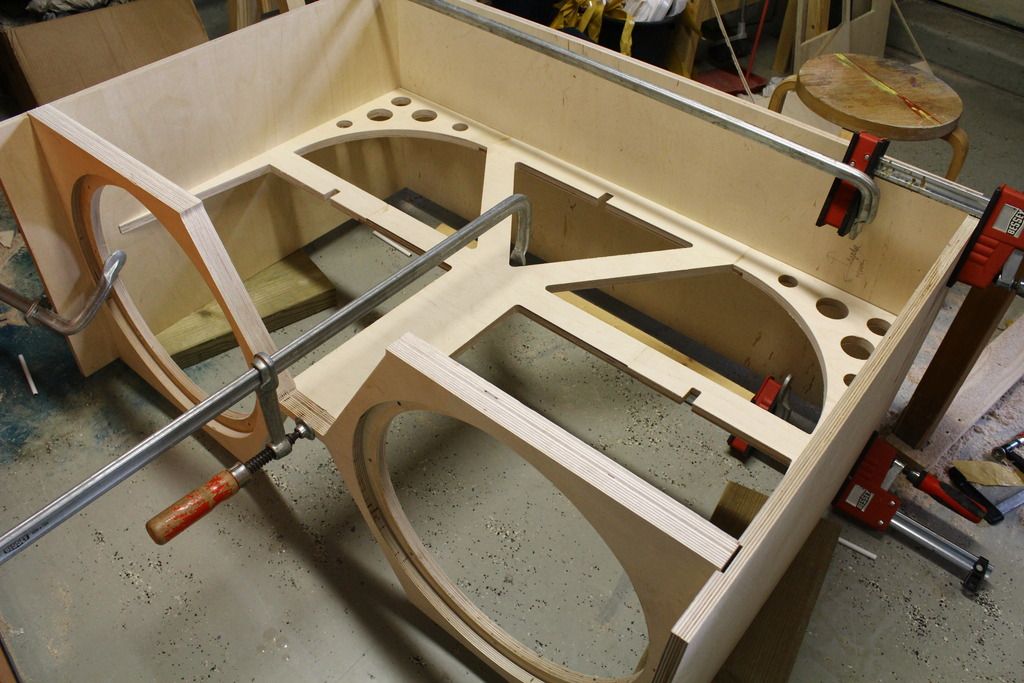 Dry-fitting everything before screws. The bracing sits in a 7mm deep groove all around, and the baffle sits in a 7mm deep groove on every side as well. 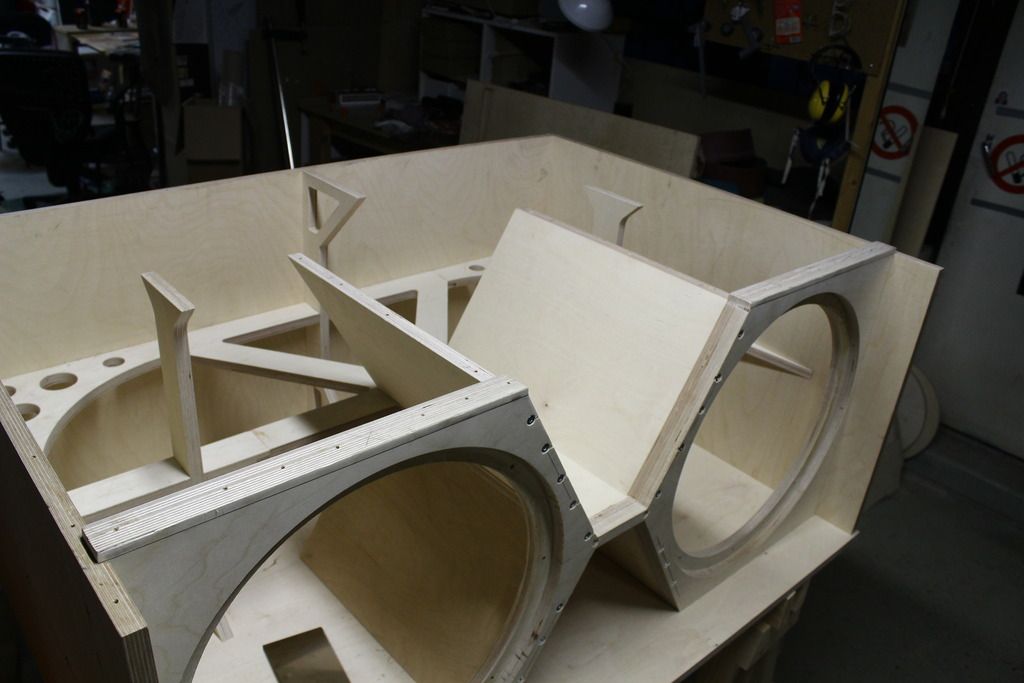 A lot of screws, I know... But I want(ed) everything to sit as flush as possible, so I don't need to fill a lot of potential gaps. 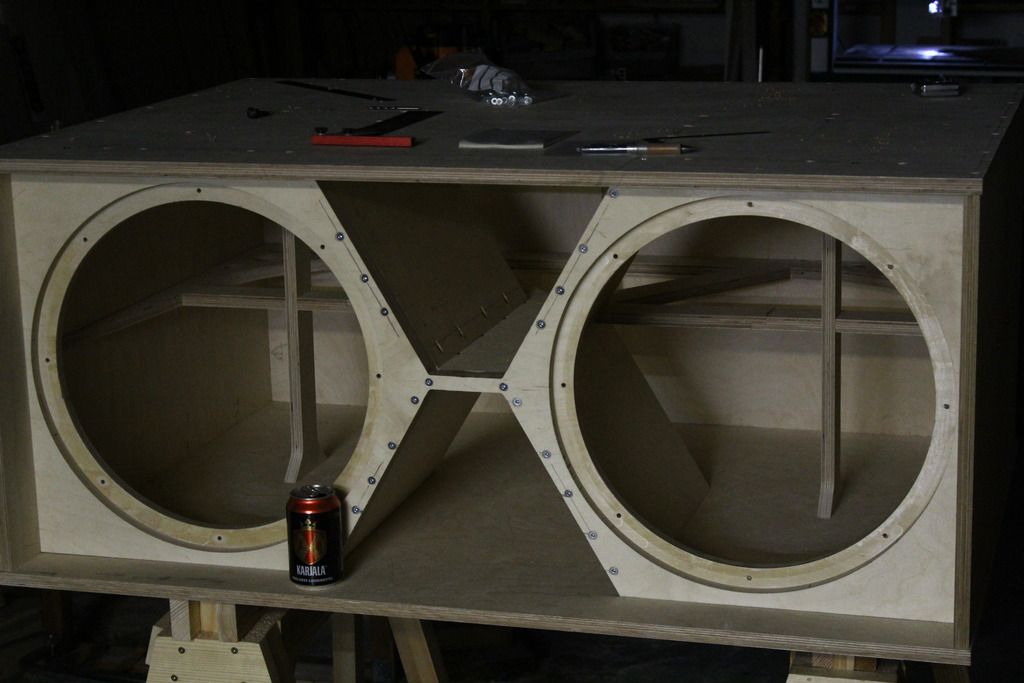 Here's how it looks now. Everything is screwed in place from outside to inside. Still need to route the holes for handles and Speakon. After that, I will take it apart, sand, and put everything except the top back together with glue and hide the screws with some woodfiller. Then I will use some silicone (or something else?) around the inside seams to make sure there is no leaks. Would you recommend to put silicone, glue, or something else in the screw holes with the screws?
|
Posted By: MarjanM
Date Posted: 26 September 2018 at 11:41pm
|
Very good job! ------------- Marjan Milosevic MM-Acoustics www.mm-acoustics.com https://www.facebook.com/pages/MM-Acoustics/608901282527713 |
Posted By: valve head777
Date Posted: 27 September 2018 at 12:03am
Liking that  ------------- Freedom of choice, choice of freedom. |
Posted By: smitske96
Date Posted: 27 September 2018 at 7:43am
| Nice job! |
Posted By: concept-10
Date Posted: 27 September 2018 at 7:56am
Very nice 
|
Posted By: I-shen Soundboy
Date Posted: 27 September 2018 at 10:02am
|
Don't use silicon anywhere that's going to be painted, like screwholes. Paint don't stick to silicon. Nasty stuff, a simple acrylic sealant would do for sealing boxes and won't rot your cones with solvent emissions. No need to glue screws, as the screwhole will pass through the glue layer (which will glue the screw).
|
Posted By: concept-10
Date Posted: 27 September 2018 at 10:22am
| Also some silicone sealants give off acidic vapours when curing and this can attack the glues and certain rubbers used on drivers. |
Posted By: wilidapili
Date Posted: 27 September 2018 at 10:27am
| Yeah I read about that, and the guy at my closest shop that sells silicone couldn't answer if the ones he had will give off these acidic vapours which is why I didn't buy any sealant as of yet. Acrylic sealant doesn't seem to be as long lasting as silicone, though. Hmm. |
Posted By: cravings
Date Posted: 27 September 2018 at 10:57am
| doesn't seem like you have any reason to expect any leaks. you've cut it properly.. glue and screws be grand. lovely build. |
Posted By: I-shen Soundboy
Date Posted: 27 September 2018 at 12:41pm
In a damp bathroom or dirty kitchen scenario, pehaps not. Inside dry dark cabinets - not a problem.
|
Posted By: DMorison
Date Posted: 27 September 2018 at 2:18pm
Some are marketed specifically as "neutral curing" - these should be ok. Examples: https://www.sealantsonline.co.uk/Products/neutral-cure-silicone-mastic-sealants" rel="nofollow - https://www.sealantsonline.co.uk/Products/neutral-cure-silicone-mastic-sealants https://www.screwfix.com/p/no-nonsense-builders-silicone-clear-310ml/83710" rel="nofollow - https://www.screwfix.com/p/no-nonsense-builders-silicone-clear-310ml/83710 Also, see if you have a shop in town that caters to people who keep tropical fish - they often build aquaria using sealant and would need to have it free of acidic residue after curing to create a liveable environment for the fish.
|
Posted By: wilidapili
Date Posted: 27 September 2018 at 2:20pm
Thanks for this. He did have some to use in aquariums. Very small tube though = expensive. I'm starting to lean towards the acrylic sealant, since it can be painted on as well.
|
Posted By: imageoven
Date Posted: 27 September 2018 at 9:50pm
This. ------------- Keep pushing on, things are gonna get better. |
Posted By: wilidapili
Date Posted: 27 September 2018 at 10:05pm
I really appreciate the nice words from everyone! I have a need/tendency to make it as good as possible with my skills, but I don't trust the outcome to be seamless even though that's what it looks like to the eye. Why not play it safe?
 Also wondering about what to use to seal the driver to the baffle. I need to read up on that soon, will probably find a ton of different possibilities. Also wondering about what to use to seal the driver to the baffle. I need to read up on that soon, will probably find a ton of different possibilities. |
Posted By: wilidapili
Date Posted: 27 September 2018 at 10:17pm
Today I made holes for the handles.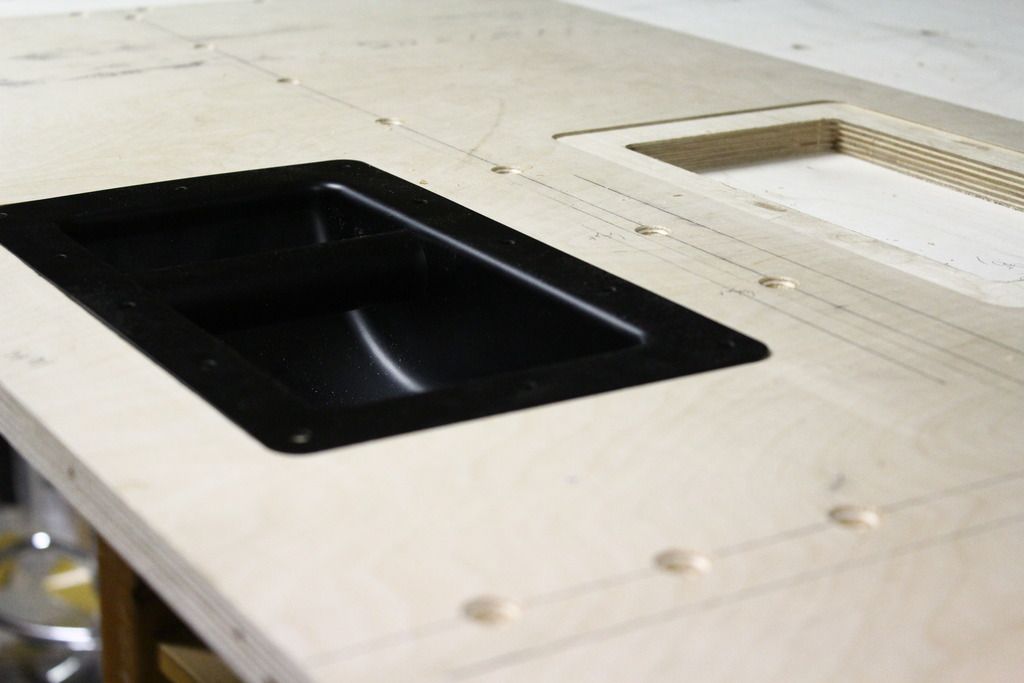 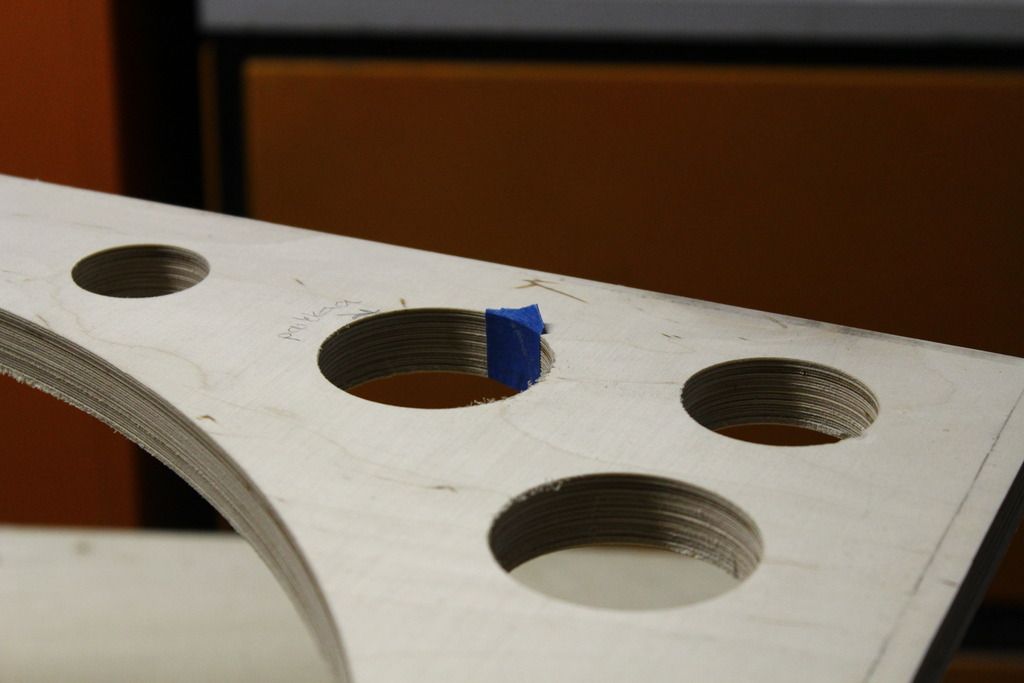 I screwed everything atleast 40mm from the corners, except 2 screws by mistake. Ofcourse both of these corners were cracked when I opened the box up, even though I pilot drilled them. I tried prying the cracks a bit open with a screw and inserted glue inside the cracks and the screw hole. 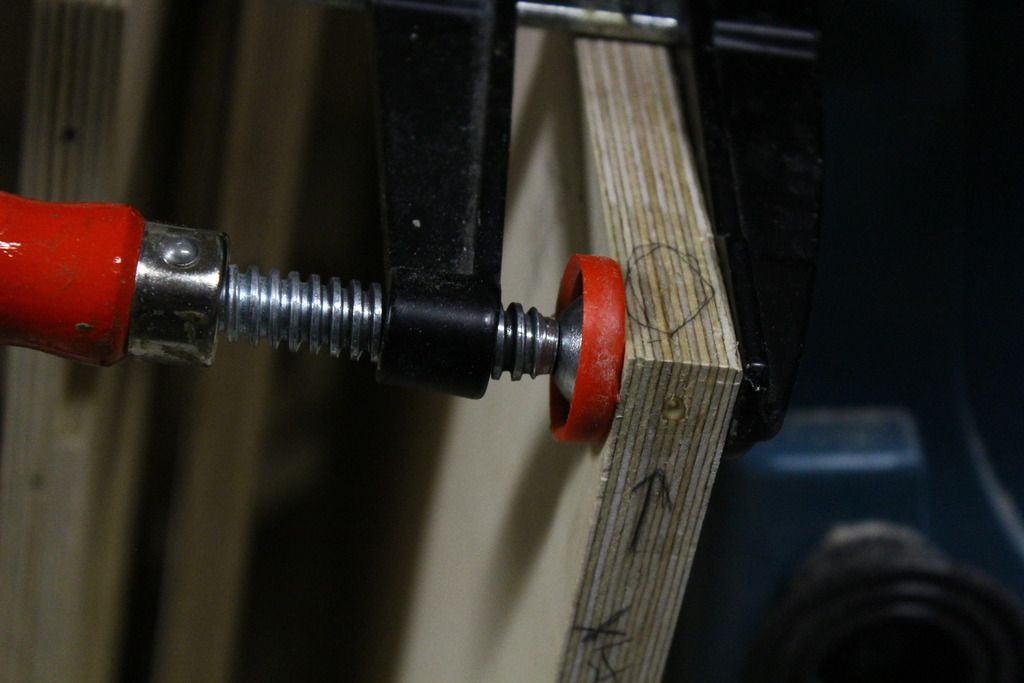 I also accidentally screwed through the top at the completely wrong spot (was very tired  ), so I routed out a 30mm diameter and 5mm deep spot and inserted a plug (perks of having a CNC - can whip up accurate jigs and other stuff) ), so I routed out a 30mm diameter and 5mm deep spot and inserted a plug (perks of having a CNC - can whip up accurate jigs and other stuff)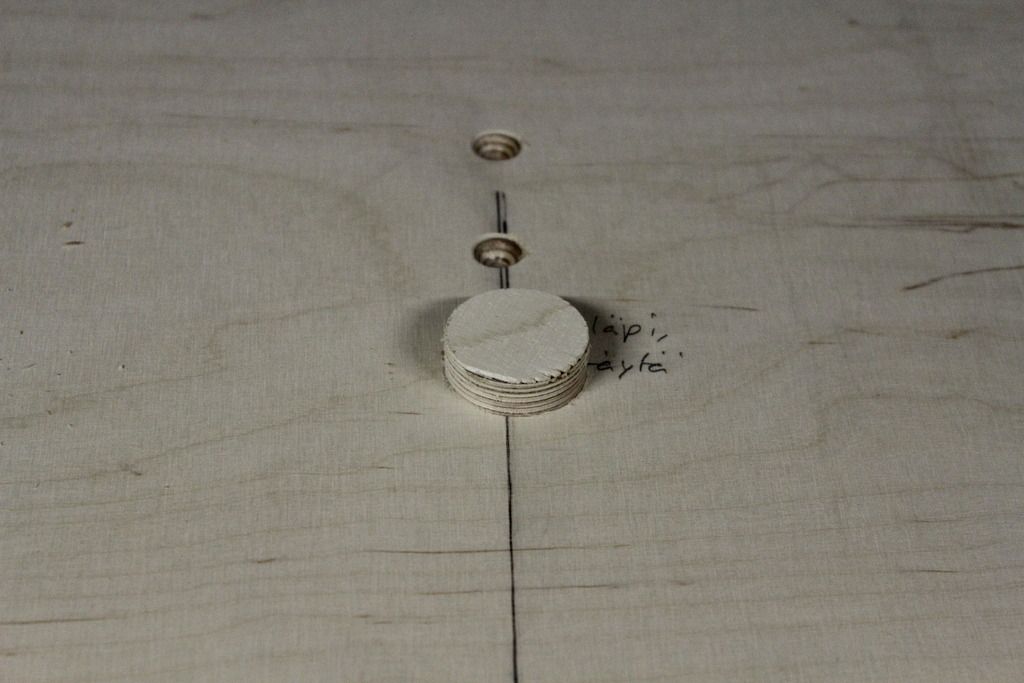 So no gluing the cab together as of yet. My goal is to able to test the sound on Monday!
|
Posted By: IainB
Date Posted: 27 September 2018 at 10:29pm
Awesome job  would love to have a CNC milling machine, my recent attempts manually aren't as nice, filler is going to be my friend would love to have a CNC milling machine, my recent attempts manually aren't as nice, filler is going to be my friend 
|
Posted By: cravings
Date Posted: 28 September 2018 at 12:02am
| just get some gasket tape for around the driver and handles and stuff. |
Posted By: boots-hifi
Date Posted: 24 October 2018 at 10:30pm
| Any updates on this build? Seriously considering getting 6-8 of this design built soon ready for next year. Any measurements made of the loaded box? 18sound recommends k10, what have you powered these with? |
Posted By: Father-Francis
Date Posted: 25 October 2018 at 7:27am
no updates yet the man has been in Denmark for sometime we were working on a project for next month here in denmark , some guys we knowneed to use a setup like this , will start another post about it .  ------------- Music is the strongest form of magic.(+45 31879997)blakmanpro@gmail.com, foa@sweetboxaudio.dk |
Posted By: nickyburnell
Date Posted: 25 October 2018 at 7:47am
360 degree DJ worship ------------- It's everything, not everythink! |
Posted By: Father-Francis
Date Posted: 25 October 2018 at 8:32am
Yes boss , ------------- Music is the strongest form of magic.(+45 31879997)blakmanpro@gmail.com, foa@sweetboxaudio.dk |
Posted By: bob4
Date Posted: 25 October 2018 at 9:16am
Just....... Wow! Wili, with that level of precision and deep rebates I don't see any reason to be afraid of air leaks. No need for additional sealing. If your cuts are spot on, dont waste time sanding, except if you are certain that there is a problem. Also you could build without screws...... Fantastic work! |
Posted By: wilidapili
Date Posted: 25 October 2018 at 11:54am
The box is 98% ready. Glued & painted, but still gotta attach the rubber feet and mount the drivers. We will try and do some measurements next week and I will post some photos of the finished box. We will get some Powersoft at a later stage, we don't yet know what we will use for the time being.
Much obliged
 |
Posted By: boots-hifi
Date Posted: 25 October 2018 at 3:06pm
| Good stuff. Keep us posted! |
Posted By: bee
Date Posted: 25 October 2018 at 9:57pm
|
Ben bin trying to get hold of you buzz me when you free.... ------------- https://www.elements-audio.com |
Posted By: boots-hifi
Date Posted: 26 October 2018 at 7:15am
PMd mate
|
Posted By: supremesoundz
Date Posted: 28 October 2018 at 6:47am
|
more pics as and when. Great work
|
Posted By: wilidapili
Date Posted: 20 January 2019 at 11:02pm
|
Sooooo.... Finally got some measurements done. Here is the frequency response of the sub, if anyone is interested. We ran the sub with a Powersoft X4 amp and through a Biamp Nexia DSP. Measured with Behringer ECM-8000 mic on same level as and about 2 meters from sub into an Audient ID4. Still learning about delaying and phase (polarity) alignment etc. Unprocessed (actually forgot to take the +8dB gain away) and processed with recommended settings from the original plans:  With the kick:  |
Posted By: ole123451
Date Posted: 09 August 2019 at 10:31pm
| What kind of speaker did you use for this subwooferbox? Did you just go with the Eighteensound 18LW3000 as they suggested? |
Posted By: wilidapili
Date Posted: 15 August 2019 at 9:34pm
Yes, we used the 18TLW3000. We have made two of these subwoofers, and they sound really, really nice. However, I am starting to build a prototype for a new subwoofer design called the "Skram" by Josh Ricci, just to get a little bit more lower extension. If you are interested, I am thinking about selling both of our double 18's. I could bring them to Denmark as I will be driving there during the fall/winter months. They have barely been "driven in", and have been used for only 4 gigs, all with a Powersoft amp and with all limiters in use, so they haven't been abused in any way. DM me if you are interested.
|
Posted By: MarjanM
Date Posted: 15 August 2019 at 10:02pm
|
Skram is a 30Hz box, so i fail to see how it will go lower then the 18sound 2x18 box. And it wont be louder for sure. ------------- Marjan Milosevic MM-Acoustics www.mm-acoustics.com https://www.facebook.com/pages/MM-Acoustics/608901282527713 |
Posted By: wilidapili
Date Posted: 15 August 2019 at 10:11pm
The tuning can be dropped by blocking a vent. Also, we'll see the comparison regarding loudness
Atleast two will be louder than one 218 box, which will be about the same driver and amp cost. Also it might have nicer dimensions. I don't know what I want yet |
Posted By: ole123451
Date Posted: 16 August 2019 at 12:00am
|
Im not sure how I send you a private message, so here you have my email: danielpedersen650@gmail.com |
Posted By: wilidapili
Date Posted: 16 August 2019 at 12:03am
Oh yeah you cannot send private messages before having 10 or so messages on the forum. I sent you an e-mail.
|
Posted By: DanielIt
Date Posted: 20 March 2020 at 9:32am
|
Hey Willi...can you share your fusion file for this build? Would love to take a look at that bracing.PM me please .
------------- Measure twice...cut once. |
Posted By: itskabini
Date Posted: 06 July 2021 at 10:05am
| I'd like a copy of that file too if possible. Hoping to get a few of these built soon, although might try and modify it into a single 18 design. |
Posted By: MarjanM
Date Posted: 06 July 2021 at 11:14pm
|
Its at the 18sound web site. ------------- Marjan Milosevic MM-Acoustics www.mm-acoustics.com https://www.facebook.com/pages/MM-Acoustics/608901282527713 |
Posted By: itskabini
Date Posted: 06 July 2021 at 11:18pm
|
I was after the fusion file with all the bracing improvements, hoping to be able to give the cabinet builder a bit more detail than just the 18Sound plans.
Also would making it into a single 18 be as simple as cutting this box in half, to effectively get two triangular vents similar to he B&C sub18
|
Posted By: lurkz
Date Posted: 30 June 2025 at 11:28am
|
Also after the fusion file here. I tried to build it myself at my local makerspace with tablesaw and router, but I am no master woodworker. I've completed the build with three crosses of bracing. But all the little imperfections add up, it doesn't look great and I can't play it as loud as I'd like. I just want to pay a CNC shop to give me the pieces all perfect-like and assemble fresh cabs. Anyone got a copy they could share?
|
Posted By: Sypa
Date Posted: 30 June 2025 at 4:43pm
|
Don't have any fusion files or for CNC but this is a pretty easy build if you ask me and I ain't no master woodworker either . Would recommend CNC rebate tho for the starting stiffness . Built these last year a bit modified length depth for fitting on top of two 636 mm cabs . 18sound 18lw2420 loaded. Love the sound quality not the loudest or punchiest just a nice reflex box . Not sure how much these freestyle braces helped, the baffle is also 30mm. Will build a few more in the future with more extensive bracing . https://ibb.co/QvLzxvPq" rel="nofollow - https://ibb.co/QvLzxvPq https://ibb.co/Nnr4NF1J" rel="nofollow - https://ibb.co/Nnr4NF1J https://ibb.co/GQ43JRxg" rel="nofollow - https://ibb.co/GQ43JRxg https://ibb.co/gbdRM6ND" rel="nofollow - https://ibb.co/gbdRM6ND
|