HD15 Simplification
Printed From: Speakerplans.com
Category: Plans
Forum Name: HD 15 horn
Forum Description: Discussion / Questions about the HD 15 horn
URL: https://forum.speakerplans.com/forum_posts.asp?TID=592
Printed Date: 27 March 2026 at 12:39am
Software Version: Web Wiz Forums 12.08 - https://www.webwizforums.com
Topic: HD15 Simplification
Posted By: matt andrews
Subject: HD15 Simplification
Date Posted: 15 September 2004 at 4:37pm
|
Firstly, thanks for an excellent resource!
I would like to make a HD15. Unfortunatly I am inexperienced in carpentry so am trying to simplify the plan as much as possible. Would either of these modifications be sensible, how much would they damage the performance of the speaker? - Replace the curved section with 3 pieces cut with angled (mitred?) edges to simulate a curve - Have the back or base removable for driver access Of course, if all go's well; I will want to make more than one 
Matt |
Replies:
Posted By: biotec
Date Posted: 15 September 2004 at 4:50pm
|
I know andrew made the modification where he had the hatch as the whole back panel and I think he found it worked fine. I think replacing the curve with mitred angles will ruin the sound of the cabinet unless you completely redesgned it. The curved section is actually not too difficult to do, its just hard work and time consuming. |
Posted By: norty303
Date Posted: 15 September 2004 at 5:09pm
|
I'd suggest reading Dom's step-by-step build for the HD15 on speakerplans. I'm sure the curved section isn't as difficult as you think. It's just the waiting for each layer to set...
(says he, never having touched a sander!! ------------- My laser stuff: http://www.facebook.com/SubsonicSystems" rel="nofollow - Frikkin Lasers |
 )
)Posted By: Dom
Date Posted: 15 September 2004 at 6:43pm
|
Personally I think if you haven't much experience then you'll be much better off building the curved section, as all you have to do is bend the wood. The only thing is waiting for the layers to dry. Much easier than cutting accurate mitres if you haven't got a table saw... I hadn't got any carpentry experience when I built my first hd15 cabs so just give it a go... |
Posted By: whitehousejamie
Date Posted: 15 September 2004 at 6:53pm
|
Hi, Just wondering, do you have to use thin layers of wood for the curve, or is it possible to bend an 18mm sheet by steam? How about when using MDF? Cheers Jamie |
Posted By: matt andrews
Date Posted: 15 September 2004 at 7:20pm
|
Excellent, thankyou for all the support guys
I reckon im gonna drive straight in and just get on with it, time to take some measurements to my local wood shop.. (when i get paid) Just a couple more questions for now For the curve, should I get the laminates cut to size to take into account the radius gaining 3mm each time eg 472 x 597 472 x 602 472 x 606 472 x 611 472 x 615 472 x 620 Also, I would like to run one of these (just to play with for now) on one channel of a QSC RMX 1850HD (360W @ 8ohms). Will i get anything usefull out of the PD154 driven with this little power. The other channel will be used for my existing full range boxes. Matt |
Posted By: whitehousejamie
Date Posted: 15 September 2004 at 7:25pm
|
The best driver to go with, if you are only going to use 1 is the P-Audio BM15LF, and its cheaper too. You would be ok with 360watts going into it, although ideally you would want 500 - 600 watts. Jamie |
Posted By: matt andrews
Date Posted: 15 September 2004 at 8:00pm
|
Once i have one working, I intend to build 3 more and invest in a hefty amp, somthing like the QSC RMX4050HD or one of the new voids everyone is talking about.
Are the P-Audio's as good as the PD's in stacks (4 upwards). I can see this getting rather expensive and being hard work; but equally rewarding. |
Posted By: whitehousejamie
Date Posted: 16 September 2004 at 12:16am
|
The best driver to use in bigger stacks is the P-Audio C15-500LF, which is little over �100. The PDs are excellent drivers, but you need a lot of power to run them properly. Jamie |
Posted By: Andrew
Date Posted: 16 September 2004 at 7:10am
|
The removeable back approach has still to get the Rog 'seal' of approval. One day, hopefully at the Soundoff, Rog will be able to compare HD15 units built in different ways. My approach is to glue/screw the four sides and baffle, and then start on the curved section using load straps to hold the wood down. Would definitely recommend doing the curved section rather than a load of mitres. Having a removeable back enables a top hat to be bolted in where the door is on the plans. |
Posted By: Jogge
Date Posted: 16 September 2004 at 7:36am
|
When doing mitres, the chance of airleaks will be bigger. I personaly would go for a nice smooth curved section. ------------- Always listen to experts. They'll tell you what can't be done and why. Then do it. |
Posted By: Andrew
Date Posted: 16 September 2004 at 8:41am
|
Also, I tend to use a tube of Gripfill per cabinet, mainly to glue down the first curved section from the inside, and thereafter any other inside edge, including the baffle. The first unit I built, the curved section was made from 2mm MDF, nice and flexible, with lots of thin strips, like a roller blind/door, effectively lots of mitres, between layers. Would definitely go the thin ply route, but the first layer is a bit tricky to bend. Thereafter you just need to ensure that there are no air gaps between layers. |
Posted By: davey t
Date Posted: 16 September 2004 at 10:39am
|
the curved section can be done in 20 minutes. Just create curved guide rails down the sides to screw too. Then glue one side of all 5/6 pieces. Screw them all into the bottom, and start bending by screwing into the guide rail ever 2cm. Worked great, we have a perfect curve with no problems. Took 2 days to build 4! Have e-mailed the construction pic to Rog but he has yet to put them up... |
Posted By: davey t
Date Posted: 16 September 2004 at 10:40am
| Oh, and you need 2 people to do it this way, one to screw, and the other to literaly stand on the layers to bend them! |
Posted By: loophole
Date Posted: 16 September 2004 at 12:16pm
|
what do you think of the structural strength of doing it that way davey? its tempting, but i'd be worried about glue in the inner layers setting correctly
certain patches inside might never get the cure they need to get the glue's full strength curved formers is the only way to go, they dont take long to make either. personally, i glued each layer, one a day. a bit of steam from a kettle can make the bending a lot easier, as can making sure the grain of the ply runs the right way (much much easier to bend when the grain runs across the curve than around it) |
Posted By: Andrew
Date Posted: 16 September 2004 at 12:57pm
| Using load straps means you can build the cabinet single handed. Can get quite a force to hold down the layers this way. |
Posted By: matt andrews
Date Posted: 16 September 2004 at 5:26pm
|
Sorry to drag this one out, but i think im gonna go with the standard access panel design. If I am doing this might as well do it right first time.
Anyway, how big does the access hole need to be (i wont buy a drive untill i have completed the box), would strips of 18mm ply be ok for the recessed bit (not sure what word to use here). |
Posted By: Andrew
Date Posted: 16 September 2004 at 5:58pm
|
Specs for most drivers are on the www. Rog likes access panels as small as possible to improve rigidity. The access hole for the driver ends up on the top of the unit, which makes it look a bit messy (with my carpentry anyway). However I've not built it dom's way, with leaving the bass (top in the diagram) off until the end of the build. My back panels are stiffened a little with an additional layer of ply glued down on part of the back to help support the speakon connectors. Good luck with the build. |
Posted By: spaceman
Date Posted: 16 September 2004 at 9:35pm
| wot size shoud i get my thin ply cut? too idle to work it out. plus is flexi-ply any cop? enquired at the timber yard its not cheap, fust for a small pannel. 30 squids for 8*4. |
Posted By: Dave Slater
Date Posted: 16 September 2004 at 10:54pm
|
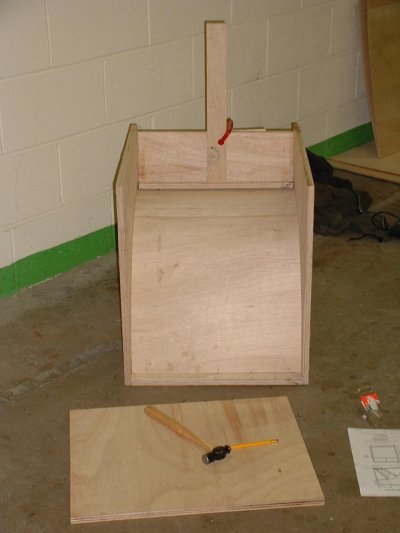
doing the curve is easy when Dom and i did ours we had the individual sheets over sized so that they all but touched the back of the cabinet make sure they're cut so that the grain goes across and there will be enough give in them glue and screw the first to a batton running across the front of the cab then bend it over and glue and screw to the top of the baffle you can then panel pin the next two sheets down with loads of pva inbetween especially from across the baffle and with plenty on the bit that over hangs to make sure of a good joint if you look at this picture you'll see a length of wood being held by a G clamp this was pushing down on to the sheets ensuring enough pressure was there during the drying so that it's sealed well
to be honest that is the most important part that you have to make sure is completely glued up or it will vibrate the final sheet is screwed through into the batton and baffle again the wood is placed there for pressure whilst drying once it's all dry all you have to do is measure 120mm from the back and saw it off in a straight line |
Posted By: davey t
Date Posted: 17 September 2004 at 9:34am
|
Its as solid as rock. Used lots of glue and screws and it set as if it was a 18mm thick piece of ply. I really reccomend doing it this way, it made them so easy to build. |
 loophole wrote:
Posted By: Andrew
Date Posted: 17 September 2004 at 9:46am
| My HD15 curved horn is built from three 3.6mm ply layers and an even thinner finishing layer, almost a laminate. I use no screws for the horn, just glue, two layers of ply and it is reasonably solid, three layers and it is rock solid, finishing layer and it also looks pretty. |
Posted By: nightline
Date Posted: 18 September 2004 at 11:27am
|
I.ve build a few double HD15 with the curved section replaced by 2 peices, and one of them is removeble for speaker access. ; The original HD15's i've build are powered by Beyma 15G400 speakers. The double versions are powered by 18Sound 15W1402, and the a few with neodymium drivers from 18Sound.
Kind regards
Jack |