HD15 3 piece build/guide
Printed From: Speakerplans.com
Category: Plans
Forum Name: HD 15 horn
Forum Description: Discussion / Questions about the HD 15 horn
URL: https://forum.speakerplans.com/forum_posts.asp?TID=87478
Printed Date: 20 April 2024 at 2:22am
Software Version: Web Wiz Forums 12.06 - https://www.webwizforums.com
Topic: HD15 3 piece build/guide
Posted By: benjo14
Subject: HD15 3 piece build/guide
Date Posted: 02 July 2014 at 12:53pm
|
Hi guys, Just completed my first ever build of 2 HD15's with 3 piece curves, got 2 more half built but will finish them over the next week or so. I know a lot of people previously asked about plans for the 3 peice and i found my self spending hour after hour sifting through the forum to find all the info i needed. So alongside my build pics i thought ide put up all my plans, CAD and cutlist etc. for anyone who would like them. I would also love some feedback as it is my first build  so... I got all my wood cut at B&Q from my cutlist as it turned out really well. I think at most a couple of pieces were missing a mm but nothing drastic. Yes i went for MDF, but as a first build i thought it a cheaper/safer option and also its nice and easy to work with as i have no tradeskills atall. 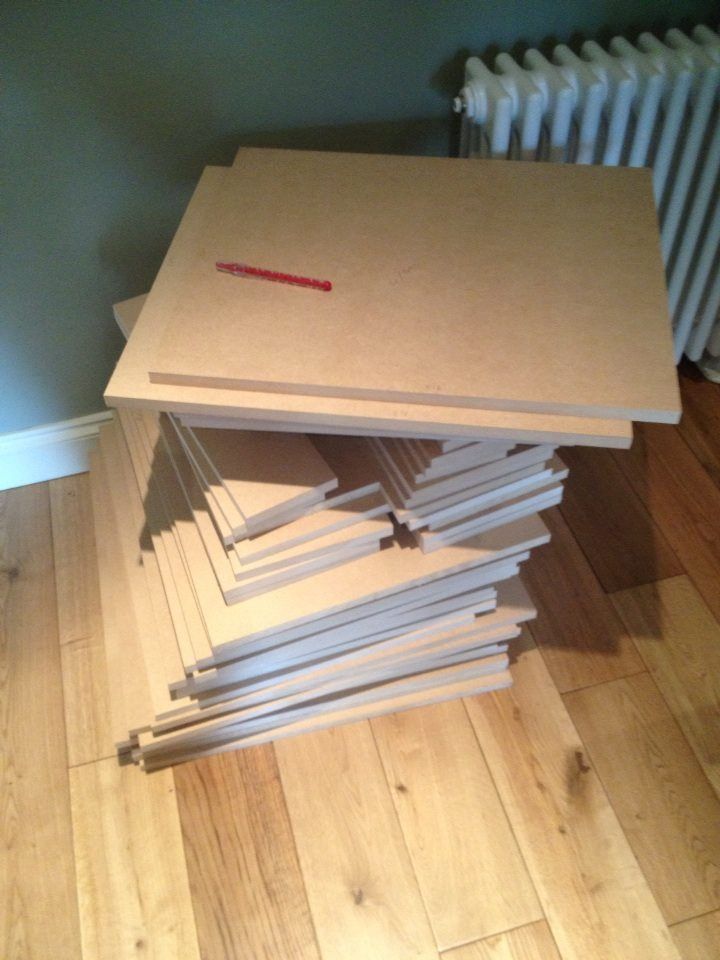 [/URL] [/URL]Next i had all the angles cut by my friend who is a carpenter as i dont own a bench saw, jigsaw or router. It did cost me a few pennies but the results were really good. hopefully i will get round to investing in some kit soon for any future builds. I also had the baffles cut, access panels, holes for speakons etc. 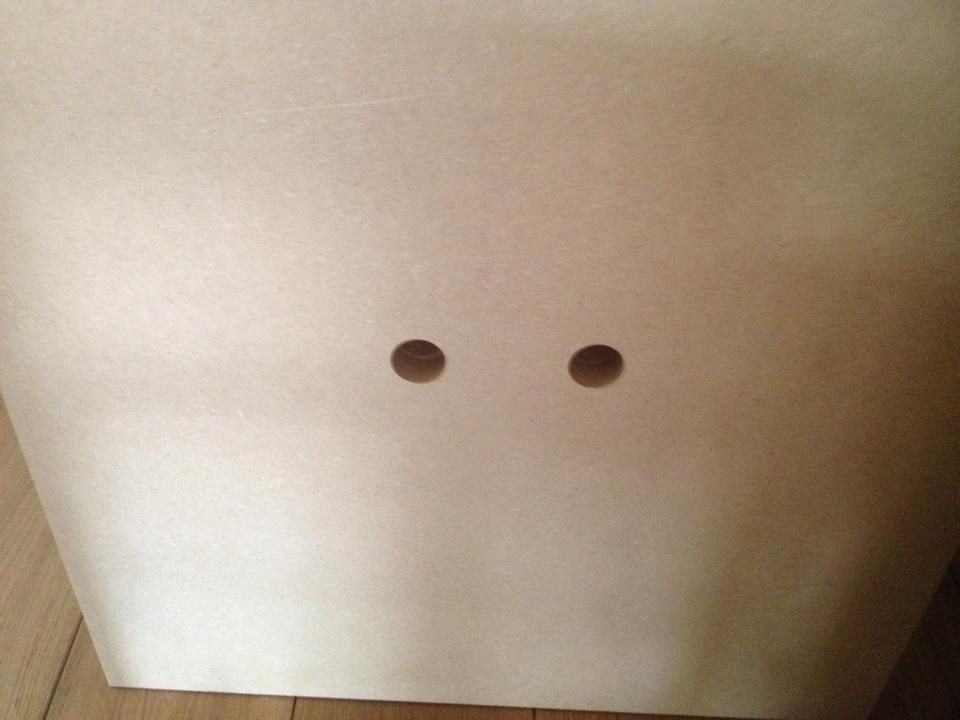 [/URL] [/URL]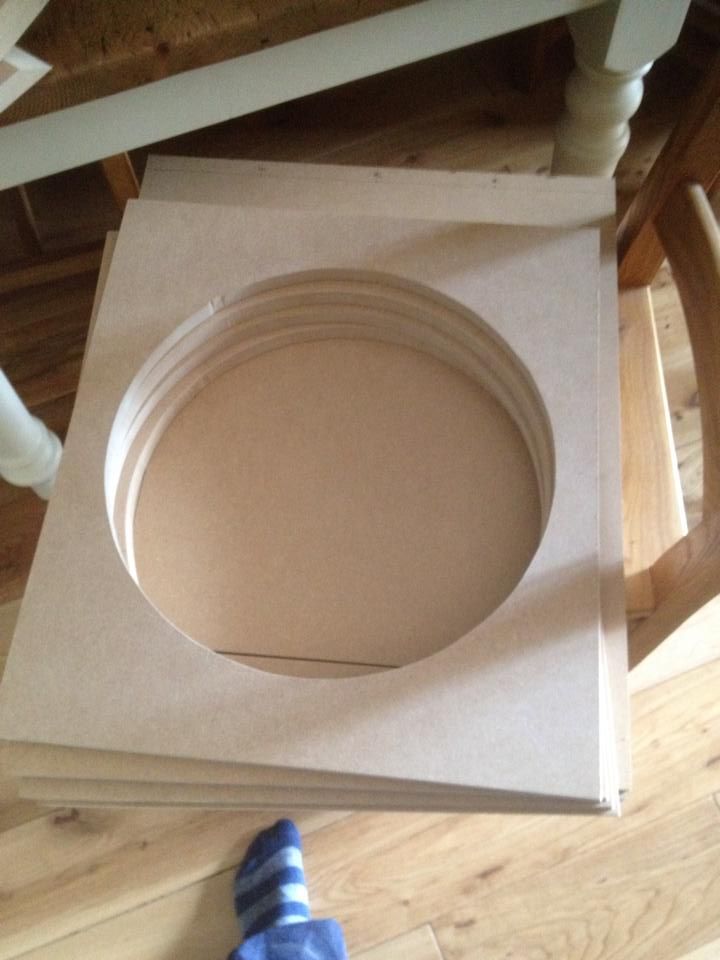 [/URL] [/URL]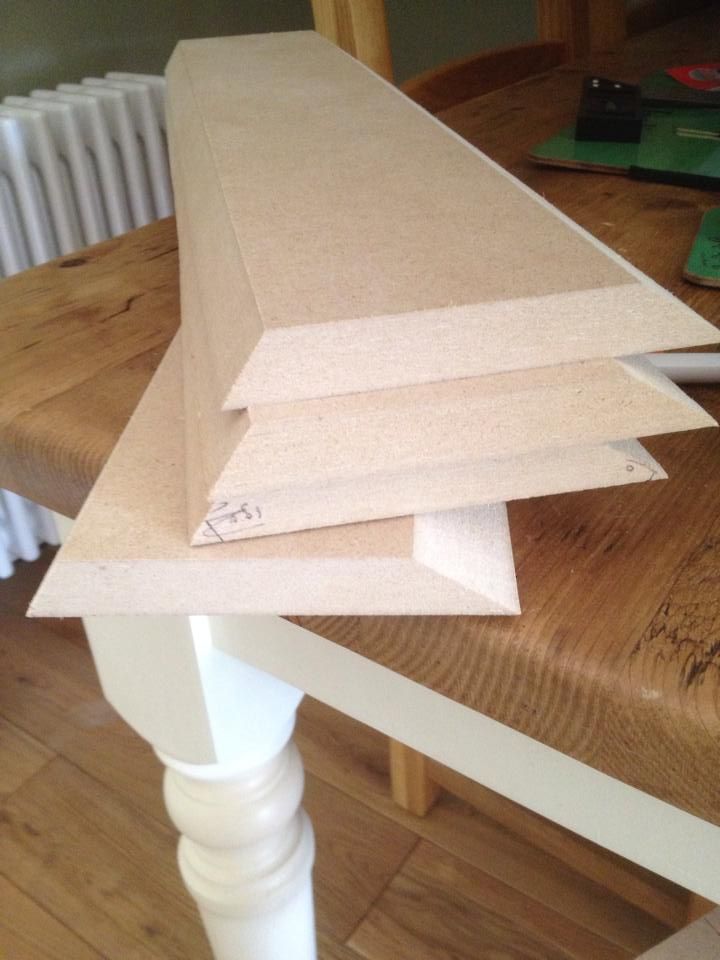 [/URL] [/URL]Next i went about sticking the base, side and back panels together, i used titebond pva wood glue, and drilled pilot holes through the sides and counterrsunk them for the screws. i used 4x40mm crosshead zinc woodscrews 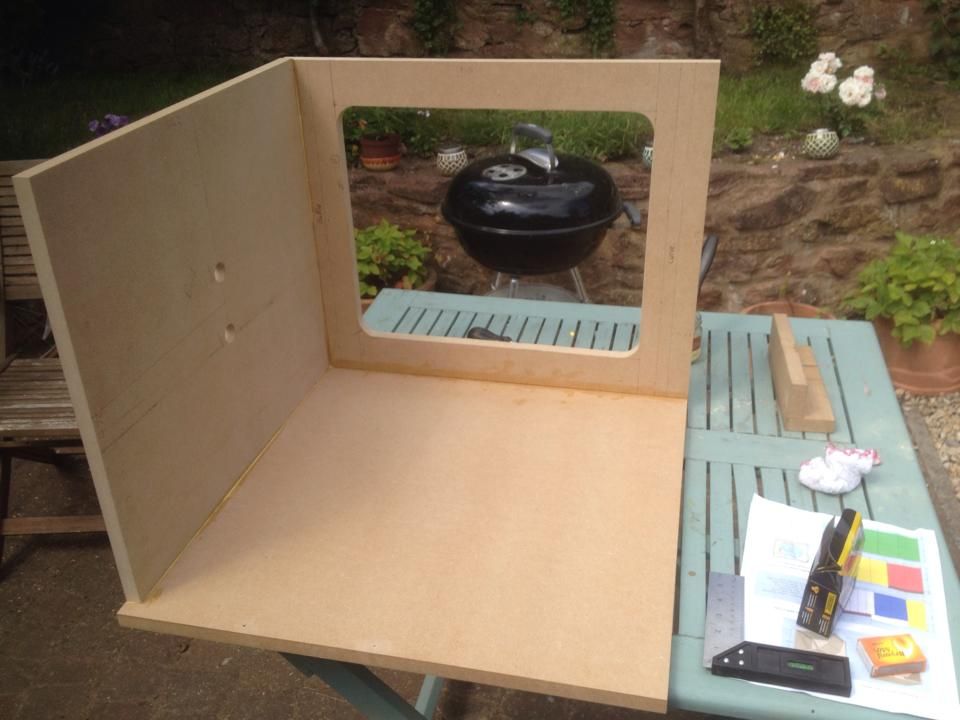 [/URL] [/URL]Next i stuck the 3 pieces together by hand and and measured drew my guideholes where my tnuts where going to go. Its just a case of drilling a hole a little bigger than the t nuts thread/chamber and hammering the spikes into the wood. 3 pronged t tuts are better as you are less likely to split the wood close to the edge of the baffle hole. I used zinc roofing bolts 1/4" x 1 1/2" for fixing the drivers. these did stick out of the baffle into the chamber slightly but shudnt cause problems. 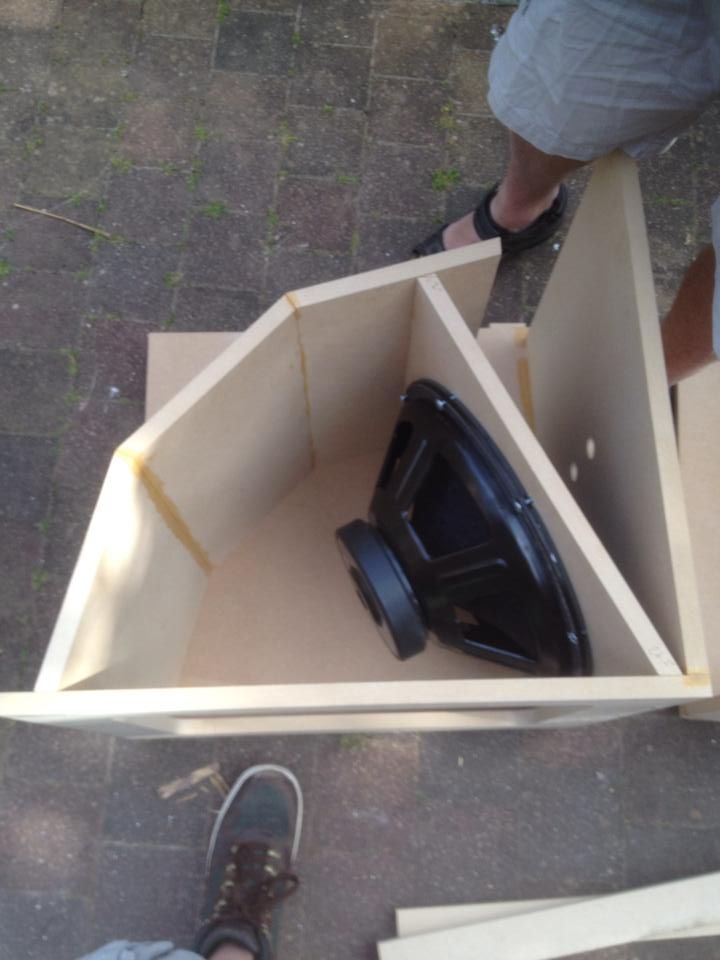 [/URL] [/URL]A small hole big enough for my wiring was drilled onto the baffle nearest the access panel so my wiring could be run through from the driver to speakons. Next i stuck the baffle in, followed by the curve, again i marked these on first in pencil so i could drill pilot holes and countersink so they could be screwed in from the side. [/URL]Next i wired them up. I tried soldering to start with but just ended up making a mess, im going to blame it on lead free solder and an ancient soldering iron but im probably just rubbish! In the end i settled for spade terminals and clips but they held pretty tight. 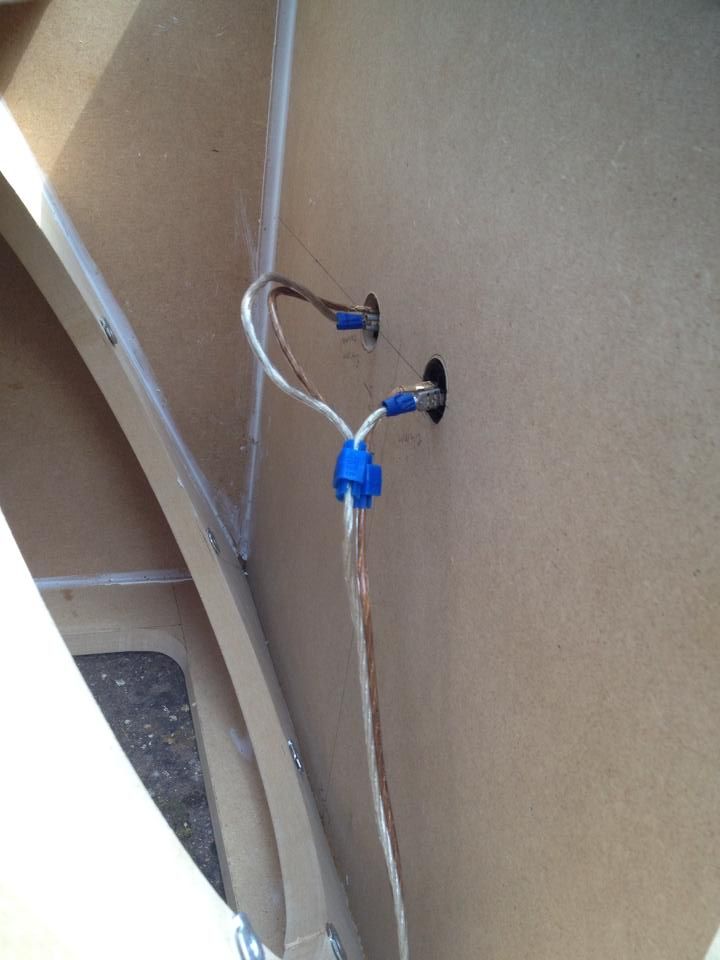 [/URL] [/URL]I was given numerous diagrams for wiring but just ended up using +1 -1 from driver to left speakon and +1 -1 on the left speakon across in parallel to the right speakon. Ive seen diagrams with +2 -2 linked between the two speakons but im not sure this is necessary. Next the top and corner piece went on. Then using some offcuts from my cutlist i managed to make a decent three side lip for the access panel to sit on. I tried for four sides but found it was going to be a little tight to get the driver in and out. Then i sealed the whole thing with silicon waterproof sealant before popping the side on and screwing in the access panel. 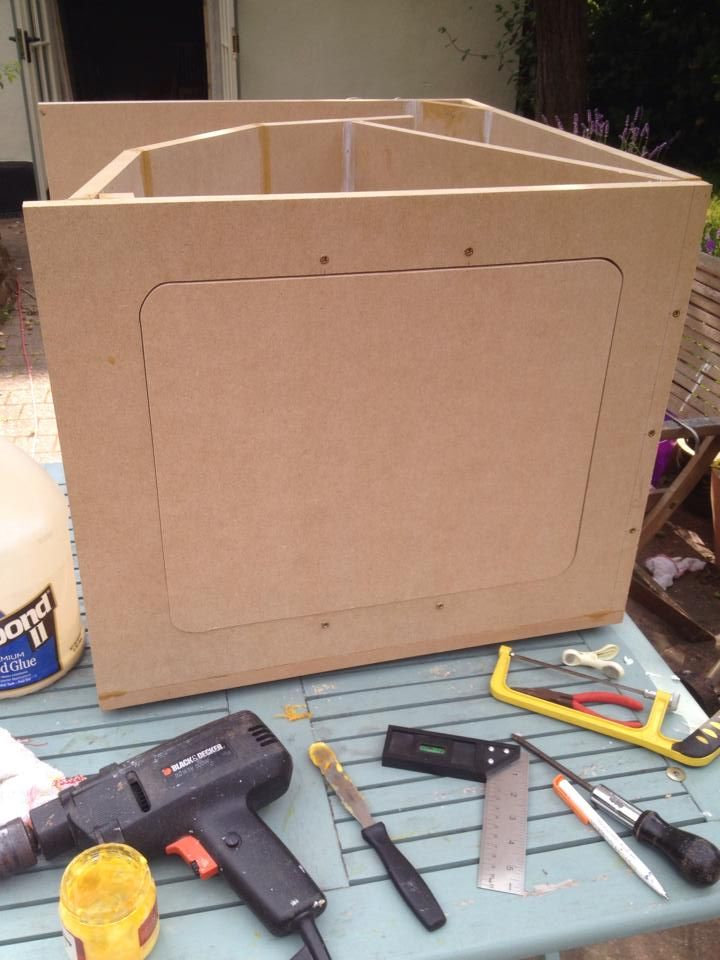 [/URL] [/URL] [/URL] [/URL]A few coats of tuffcab. Tested them and were a few rattles from the acces panel, but i added some of that rubber draught excluder stuff along the edges and tighten them some more and they sound brilliant. 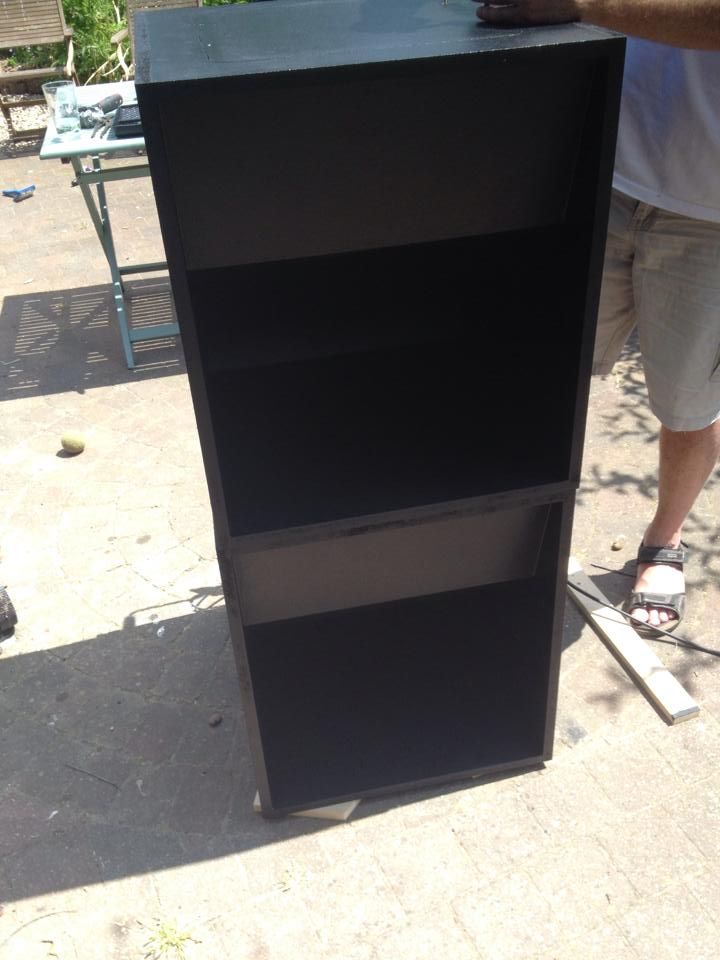 [/URL] [/URL]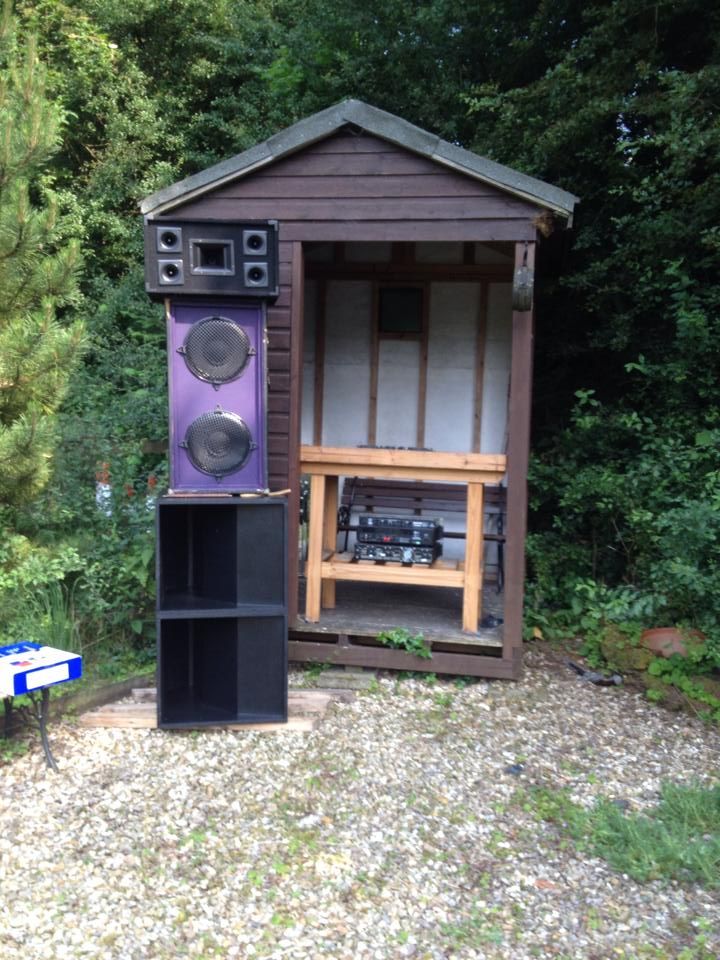 [/URL] [/URL]^^ no comments on the crappy topbox, im working on it.... Here are links to the sketchup file, and cutlist, plan etc. hopefully they work and somebody finds this usefull in their build. If you are building them though still read through all the forums and do loads of research as you'll learn so much. https://www.dropbox.com/s/eucofmzh77ycxpl/gsu%2015.skp https://www.dropbox.com/s/usmc7nzd06dbspu/hd15.docx Ide love some feedback as am hopefully building some X1's to sit underneath next. Cheers Ben
|
Replies:
Posted By: DanielIt
Date Posted: 02 July 2014 at 1:05pm
|
You definetly have to buy a router to roundip the edges.Will look so more profesional.And i can see no handles on them...yet? ------------- Measure twice...cut once. |
Posted By: all bass
Date Posted: 02 July 2014 at 3:14pm
|
Looks good! Tip for your next build: Don't use silicone but acrylic instead. The silicone fumes can damage the driver. |
Posted By: Dub Specialist Sound
Date Posted: 02 July 2014 at 6:35pm
|
Agreed with dan , but yu can do them with a rasp and sandpaper done it many a time myself in the past...with good results still, but as he says you can beat a router for nice and speedy finish... ------------- Musical Roots Reggae Vibration is Life! for music is sound...sound is vibration...vibration is energy... and energy begets life. Therein lies my passion!...MUSIC IS LIFE... |
Posted By: njw
Date Posted: 05 July 2014 at 10:06pm
| As above really, the woodwork looks really good (much better than my first attempt!) but I would be tempted to add a brace as per the plans, I wouldn't trust connections like that in a cab of mine though, I think with vibration acting upon them you could end up with a short circuit and possibly a dead amp, a decent soldered connection would be so much better, if you weren't far from me I would even bring the soldering iron round and sort them out for you!! |
Posted By: kr1sounds
Date Posted: 10 July 2014 at 12:06pm
|
how did you do the curve, i was gunna use like 6 bits of 3mm thick wood and do it that way |
Posted By: benjo14
Date Posted: 10 July 2014 at 12:32pm
| It's all in the links I put up. It's 3 pieces, still 18mm with 15 degrees cut off each end |
Posted By: Dub Specialist Sound
Date Posted: 10 July 2014 at 10:01pm
|
Kr1 yes yu can do the curve with 3-4mm ply built up, know many 'scoops curve' back inna the day like it too, even hardboard cus money was very tight!!! ------------- Musical Roots Reggae Vibration is Life! for music is sound...sound is vibration...vibration is energy... and energy begets life. Therein lies my passion!...MUSIC IS LIFE... |
Posted By: Yespa
Date Posted: 09 May 2017 at 1:52am
|
Is it still available the cut sheet and the plan you use? Deadlinks :/ |
Posted By: shagnasty
Date Posted: 09 May 2017 at 2:04am
|
Mate really nice build, but the wiring.... I have said a thousand time the ONLY way to do Speakons is solder and Hellerman sleeves, small Heat shrink if you must, but never crimps. It also looks like you haven't flushed down the speakons, which IMHO is a very bad idea, either buy a disk (shoddy, costs money and requires recessing) or just blow 100mm hole and mount your connectors on a plate so they are recessed. If you must use crimps (and really don't ever) at least wack and bit od PVC tape around them in case they come adrift/something shorts them.... +1 for a blow over with a 6mm radius cutter, really makes the cabs look smarter and save the edges in transit. Also +1 for avoid silicone on builds at all costs..... But as I said, Nice job! |
Posted By: Risc_Terilia
Date Posted: 09 May 2017 at 8:57am
3 years after the event he may or may not be bothered by this advice 
|