
|
NEW G Sub Build for Lowrider 18 |
Post Reply 
|
Page 123 5> |
| Author | |
DiscernAudio 
Young Croc 

Joined: 08 June 2011 Location: Alabama Status: Offline Points: 541 |
 Post Options Post Options
") Thanks(0) Thanks(0)
 Quote Reply Quote Reply
 Topic: NEW G Sub Build for Lowrider 18 Topic: NEW G Sub Build for Lowrider 18Posted: 07 December 2011 at 3:35pm |
|
This is box is for 2x Peavey Lowrider 18
Vb=13.5 cu ft Fb=35 hz F3=34.73 Luckily my dad and I have a cabinet/woodworking shop, so the build went smoothly. No baltic birch sold in my area. (I hunted for weeks). The ply used is 9-ply 18 mm Sandeply by Endesa (Equador) from Home Depot. I had my doubts at first with it, but it has been GREAT only 2 SMALL voids found in 4 sheets. Cuts and routes nicely and only about $45/sheet(4x8) 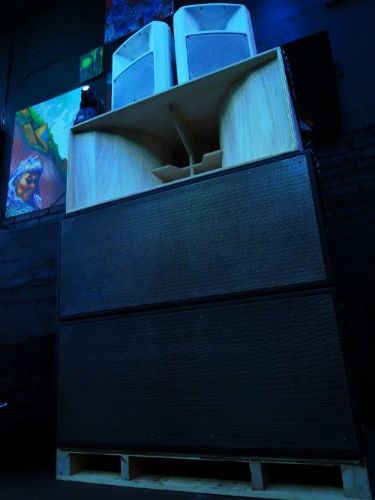 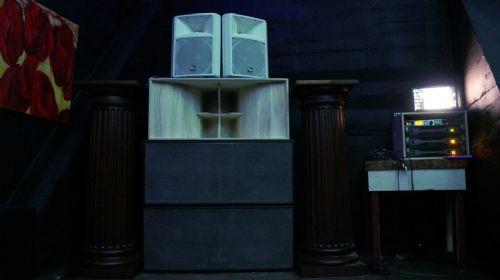                      More pics to follow. Edited by DiscernAudio - 03 April 2015 at 3:10am |
|
 |
|
|
RealitySound
Young Croc

Joined: 01 February 2011 Location: Bermuda Status: Offline Points: 1142 |
Post Options
Thanks(0)
Quote Reply
Posted: 08 December 2011 at 12:59am |
|
Looks good so far!
 |
|
|
When you gonna send me some $$ mate ?
|
|
|
|
|
t.geessounds
Young Croc

Joined: 10 May 2010 Location: US... New york Status: Offline Points: 908 |
Post Options
Thanks(0)
Quote Reply
Posted: 08 December 2011 at 2:45am |
|
wats that jig with the clamp on pic 4
|
|
|
|
|
DiscernAudio
Young Croc
Joined: 08 June 2011 Location: Alabama Status: Offline Points: 541 |
Post Options
Thanks(0)
Quote Reply
Posted: 08 December 2011 at 3:28am |
We just clamped two squares to a block. This was to help get our first three sides nice and square. My dad is used to building cabs by himself and it is one of his tricks. We didn't use it much as we there were two of us, but it along with that lead weight on top helped as a counterweight to hang the cab off the table to install bottom screws. We did make that make that jig you see on the router. |
|
|
|
|
Meshakroots
Registered User 

Joined: 28 April 2009 Location: Houston, TX Status: Offline Points: 55 |
Post Options
Thanks(0)
Quote Reply
Posted: 08 December 2011 at 3:30am |
|
Looks effin' clean Sadler! Been trying to figure the best way to cut my 18's out and that looks perfect on the router. I was thinking something similar but you just showed me what to do, thanks!

|
|
|
|
|
Nitz V1505
Old Croc 

Joined: 16 September 2009 Location: UXBRIDGE Status: Offline Points: 1719 |
Post Options
Thanks(0)
Quote Reply
Posted: 08 December 2011 at 3:16pm |
|
Nice build so far dude!!!! Wood looks good , cant see any knots.
|
|
|
LET THE BASS ROLL LIKE THUNDER
& THE TOPS LIKE LIGHTNING..... |
|
|
|
|
rhuet99
Registered User
Joined: 24 May 2009 Status: Offline Points: 105 |
Post Options
Thanks(0)
Quote Reply
Posted: 08 December 2011 at 5:45pm |
|
Nice trick with the framing squares. I may have to use that. I have a couple of equilateral triangles with a wide flange on two sides that allow clamps to be placed. Works great when one builds alone.
|
|
|
|
|
DiscernAudio
Young Croc
Joined: 08 June 2011 Location: Alabama Status: Offline Points: 541 |
Post Options
Thanks(0)
Quote Reply
Posted: 09 December 2011 at 6:37pm |
|
3 new pics added
|
|
|
|
|
Edd Jordan
Young Croc

Joined: 10 January 2008 Location: United Kingdom Status: Offline Points: 1364 |
Post Options
Thanks(0)
Quote Reply
Posted: 09 December 2011 at 7:03pm |
|
Good build!
|
|
|
I do a sideline in ply wood wheels.
|
|
|
|
|
DiscernAudio
Young Croc
Joined: 08 June 2011 Location: Alabama Status: Offline Points: 541 |
Post Options
Thanks(0)
Quote Reply
Posted: 13 December 2011 at 2:39pm |
|
1 new pic added to bottom.
Tops will be going on today. Pics to follow. |
|
|
|
|
Herb-i
Registered User

Joined: 22 November 2011 Location: Bolton Status: Offline Points: 275 |
Post Options
Thanks(0)
Quote Reply
Posted: 20 December 2011 at 4:23pm |
|
Looking good fella
|
|
|
|
|
aperrado
Registered User
Joined: 10 January 2008 Location: california Status: Offline Points: 315 |
Post Options
Thanks(0)
Quote Reply
Posted: 21 December 2011 at 3:46am |
|
are u making changes in this box to fit the lowriders? like bigger box,ports or something.
|
|
|
Im hard to learn but still asking
|
|
|
|
|
Post Reply
|
Page 123 5> |
| Tweet |
| Forum Jump | Forum Permissions You cannot post new topics in this forum You cannot reply to topics in this forum You cannot delete your posts in this forum You cannot edit your posts in this forum You cannot create polls in this forum You cannot vote in polls in this forum |


 Topic Options
 t.geessounds wrote: